Showing posts with label DIY. Show all posts

Tuesday, February 10, 2015

Around the House

 This blog is basically my way of keeping track of things, my online journal. It's fun for me to look back at past projects or see before and after pictures. I (obviously) don't always post everything that I do. But in an attempt to remember some of the little projects, I'm lumping them together in this post.

First up is the window bench. A few weeks ago we went to my parent's house and my mom was getting rid of these cushions. I took them thinking they would be perfect for the window seat! I recovered them with some fabric, also from my moms purge pile. I've been meaning to put cushions on here ever since this bench was build (oh, about 3 years ago!). Better late than never, right?


This project is seriously overdue. I made this hook last spring LAST SPRING! It's been sitting in the corner next to this bench since then. Seriously? Seriously. You see my husband has this thing about holes in the walls and things being level, blah, blah, blah and so I have this thing about not hanging stuff on the walls. That's his job. Just to ensure that it's hanging the correct way and only done once, you know. If it were me I probably would have just screwed right through the wood straight into the wall. I wanted this thing to hang flush on the wall. Anyway - by some small miracle, I convinced my husband to hang it for me this past weekend and I love it! The wood is some old barn wood we collected and the knobs are from anthropologie.


I love how it makes this little corner more functional. We can actually hang hings up and sit on the bench to take shoes off etc.


If you follow me on instagram you saw a sneak peek at this blanket. It is April Rhodes Arizona fabric that I purchased last summer and have been coveting ever since. I had lots of ideas for what to make with this but when it came down to it, I just didn't want to cut into it. It's a super soft jersey knit. So I ended up finding an old fleece blanket that I had and making a little lap quilt. I simply put the two pieces together and sewed down every forth line of the pattern. I finished it off with some satin blanket binding. It's so cozy!


I recovered a big cushion I had with this fun fabric for a new "reading pillow" in Sage's room.


I'm pretty sure I never shared this. We made Wyatt a new bed! We used plans from Anna White. I love the way it turned out and it really gives him lots of storage room.


So that's the big project dump for now. A little sewing, a little building and a little home decorating!
Thanks for reading.

xo
-V

Thursday, January 15, 2015

Best (and Easiest) Christmas Gift

For those of you that know my Sage, you know how much she loves her blankies. That girl would drag a blankie around all day every day if I let her. I was inspired by some super cute fleece I got to make her a no-sew fleece blanket for Christmas. It was super simple and doesn't even require a sewing machine - just a pair of scissors. Here is a quick tutorial:
I laid two pieces of fleece, approximately 1 yard each, on top of each other and cut them to the same size. I then went around all four sides and cut slits on the edge 2 inches wide by 4 inches deep. I then cut a slit at the top of each piece about 1 1/2 inches long. I did this with a cutting mat under the fabric and a rotary cutter. I took the ends of each piece and threaded them through the slit and pulled it through. That's it!


Here is a prime example of my girl and her blankies.. Do you see the second blanket in this picture?


My girl loved it! If anyone asked her what she got for Christmas she'd tell you about the blankie her mama made her. Best feeling ever! So I say this blanket is a win-win.

xo
-V

Wednesday, December 31, 2014

New Year

For some reason I'm really looking forward to 2015. Not because 2014 was bad. I love the fresh start and clean slate of a new year. For me it's like spring time - a time to clean out my closets, purge stuff that I no longer need or use, organize and start again. I'm the type of gal that only let's my Christmas tree linger for a few days after Christmas. Definitely gone by New Year's Eve. I have boxed it all up, cleaned the house, simplified and I'm ready to ring in 2015.

One of the biggest things that needed some attention was my pantry. I've been experimenting with preserving food / jam for the last 6 years and there were some jars dating as far back as 2008. Okay - quite a few jars actually. They were taking up lots of space and never going to be consumed. I hate wasting food but it was time for them to go. There was also lots of general clutter that needed to be addressed. My pantry is really deep so it's hard to see what's going on in the way back. So I dumped all the old jars and anything else that was old, put a few shelves in, wiped all the surfaces and organized what was left. I'd still like to get a few more baskets to corral things like pasta and snacks but it's already looking way better.


 While cleaning out the pantry I threw out a bunch or well used cloth napkins. So of course I had to sew a few more. So that happened and it's the perfect addition to my cleaned out pantry!


 The last thing I'm sharing are these trivets (thanks to Pinterest). I made these this year as Christmas gifts and I had a few left over. I love the contrast of the dark stain and white washed wood.


Happy New Year!
xo
-V

Wednesday, June 25, 2014

Garden Herb Body Scrub

I have all these delicious herbs growing in my garden that I'm not quite sure what to do with besides occasionally cooking with them. So I spent a little time on pinterest (oh, pinterest!) and found some recipes for body scrub that I decided to try. I combined a few recipes to suit my needs (and what I had on hand). I ended up making two variations. So here's what I used:


-1 Cup Sugar
-1 Cup Epsom Salt
-1 Cup Avocado oil
-1/4 Cup fresh chopped rosemary
-20-30 drops of Lavender essential oil
-1/8 Cup fresh chopped mint Or Lavender buds

You could also add peppermint or rosemary essential oil to make it a bit stronger.

Mix all ingredients together in a bowl with a wooden spoon.

 Scoop into glass containers, seal with tight fitting lids and label.

This scrub is wonderful after working in the garden all day. Just take a generous scoop, rub into hands and wrists and rinse off.
 It's perfect for the shower or tub too!

-V

Thursday, June 19, 2014

Sneak Peek.... House in the Trees

A tree house has been on our "to-do" list for a while. This summer hubby decided to get it done. So with the help of his dad, mom and a few others our house in the trees is coming together. It's not complete yet, but it's getting there. And if you know my husband at all you know that he doesn't do anything half way and bigger is always better!

Next up: railings, stairs and tree house accessories. Stay tuned!
-V

Wednesday, June 11, 2014

Out with the Gold

 We've lived in our house for 3 1/2 years and I'm ashamed to admit that this awful gold skeleton of a chandelier has been hanging up the entire time. With no light bulbs or glass. I didn't work and I saw it every day. In fact I saw it every time I came down the stairs. So awful!


Since I'm currently in project mode, I decided it was high time to change that. One of my favorite blogs to follow for DIY home inspiration had just purchased this light for her entry and I loved it! It's big enough to fill the space and make a significant impact but also simple and classic.


I put an Edison bulb in it which gives off the perfect glow at night, just like a night light. And really, besides the fact that both my husband and I had to get on the ladder nearly 20 feet up while he wired the light and I held it, this project was easy!


Oh and while I was up there and the ladder was out I got to clean all the dead flies and dust off the window sill that I can't reach otherwise. Of course that lead to cleaning the window inside.... and then climbing on the roof and cleaning all the windows on the outside... and then since the ladder was up and I was on the roof - cleaning out the gutters. Whew! I love that kind of project! It leaves me feeling productive and that one new light leaves a big impact. Crossing that off my list, next up will be new lights outside, then the porch....


Sunday, November 10, 2013

Wyatt's Room Re-Do

This re-do is seriously overdue. It all came to a head last week when I found myself super frustrated with Wyatt for not cleaning his room. It was then that I realized that he didn't have any good options on where to put all of that stuff that young boys collect. I needed to do something to help him and his disaster of a room. So when he left for the weekend to go hunting with Daddy I headed straight to IKEA with all the measurements I needed (SO glad I thought of this before I left the house!). Wyatt's room has this awkward little cubby/nook and I found a tall bookshelf that fills the space perfectly. All of his books fit on it plus most of his stuffed animals (that he refuses to minimize). I did away with his side table and moved his bed next to the new bookshelf where I put his lamp.

Before: Middle of re-arranging, excuse the mess!

Before: The awkward cubby

Before: The awkward cubby with too small shelf.

After: The nook with new bookshelf.


The other new addition was a desk. A school boy needs a desk. I've been casually looking around since the summer for a small child size desk. I thought maybe I could find one at a garage sale and update it for him but I never found anything that great for the right price. This new desk matches the bookshelf and it's the perfect size for a young child. Also - it has a magnetic white board hutch that fits on top of the desk. This gives just a little more storage, plus trophy display area, and it's perfect for the kid who likes to display his art/signs/warnings/notes all over the wall. Now he has a specific place for that.

After: New desk!
After: Desk

The room re-do wouldn't be complete with out a little DIY. And by little, I really do mean little (as long as you exclude the hours it took to assemble the furniture solo). I glued some of Wyatt's toy dinosaurs to some magnets and - Voila! Cute and functional for the boy. Less than 5 minutes.
DIY dino magnets

I've got a few things left to finish - like bolting that tall shelf to the wall and adding a little over head light to the top. But the other DIY I'm hoping to complete soon is a upholstered headboard. I already have the fabric - some camo Wyatt picked out a while ago (shocking, right?). Now I just need the hubby to cut me a piece of wood and I'll be ready to start.

I always struggle with putting things on the wall. I like to have artwork/ pictures up but I feel like I'm too picky and so I just do nothing. What do you think should go on the walls in here?

Thursday, October 31, 2013

Big Girl Bed & More

I've been sitting on this project for a while now and finally got it done. I feel like Sage's room is complete...for now. I found a head board and foot board at a local thrift shop but it didn't have any rails. Thankfully I have a super handy father-in-law who is always willing to help me with my projects. He mad a simple frame that we then screwed to the headboard and foot board. This is after I painted it all white, which is really what took me so long to finish this! Unfortunately I don't have any before pictures of the bed but I do have before pictures of Sage's room. Here goes:

Sage's Room Before

After: New Bed

There are a lot of things in Sage's room that I DIY'ed over the last few years and just never blogged about. So here is a little breakdown:
The paper butterfly banner is leftover from her last birthday party. I punched out a pile of paper butterflies and sewed them all together.


 The dollhouse was Sage's 3rd birthday present from her dad and I. It was built using Anna White's plans, modified to be a bit smaller. Dennis did most of the building and I did most of the painting.


This little side table was a thrift store score that I painted red.


Thrift store embroidery hoops filled with some of my favorite fabrics.


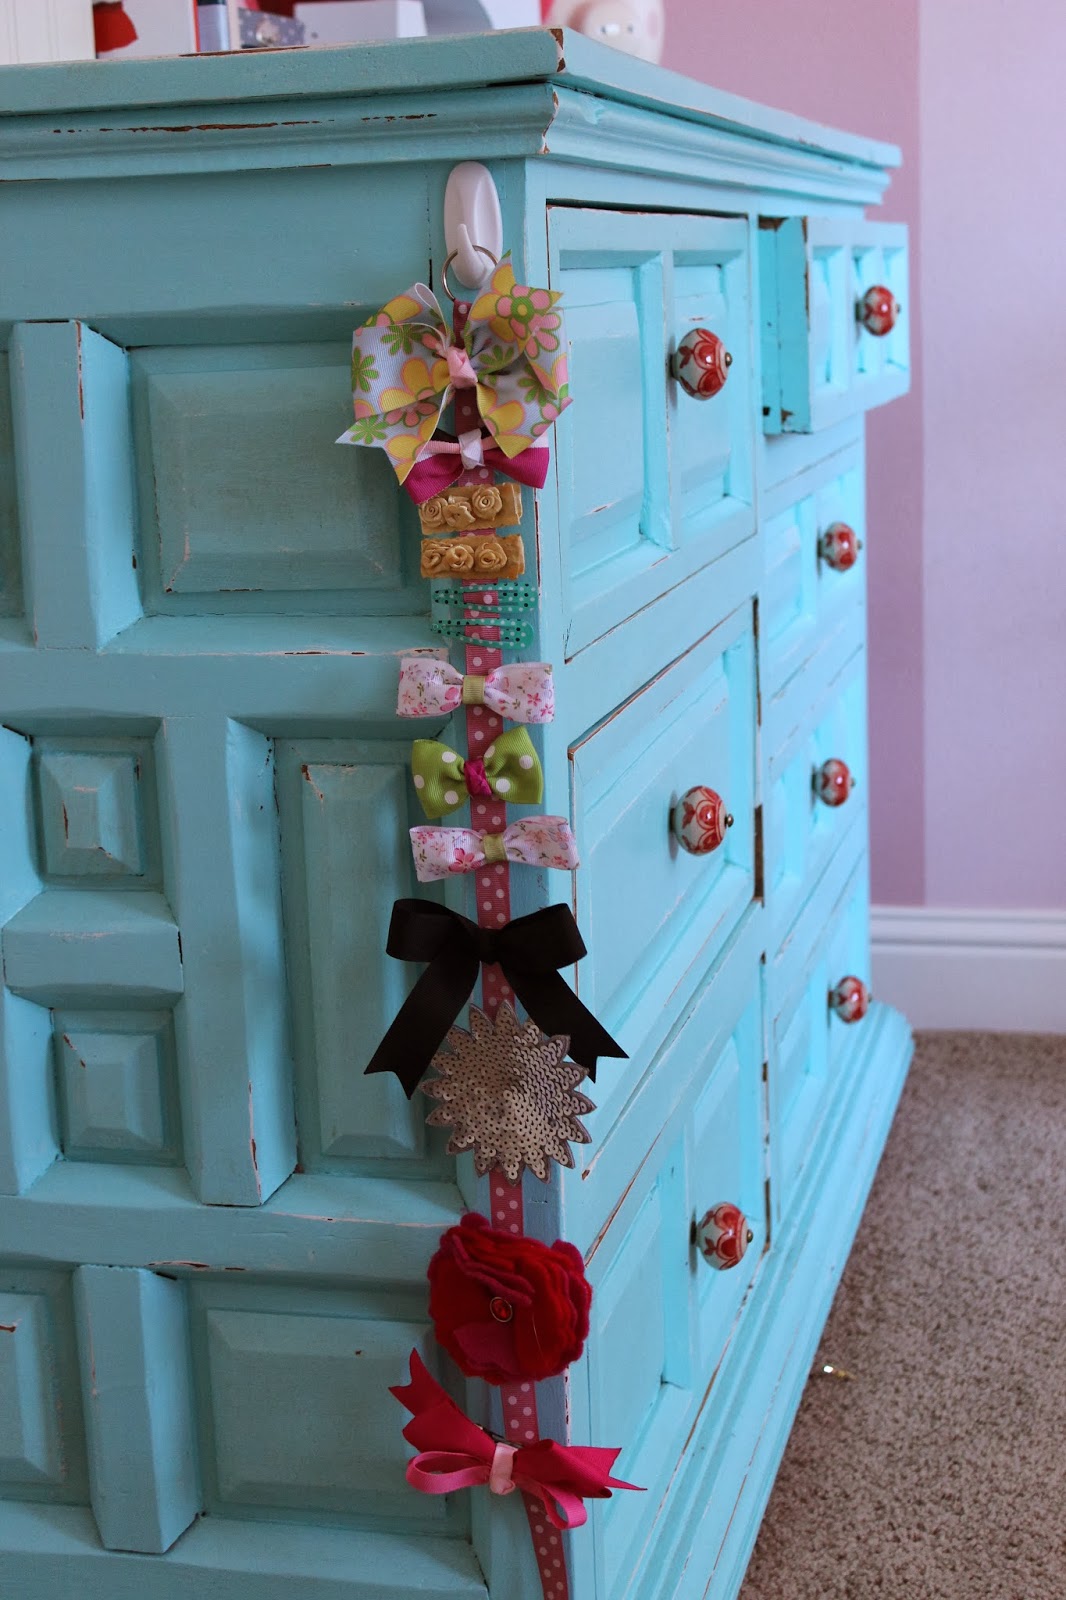
A super simple ribbon to hold all her hair bows.


I love how fun and bright her room is with the pink, red and turquoise!


Friday, October 11, 2013

Fall Decorating


I've never been a huge Halloween decorator but this year I added a few touches to my front porch in the spirit of Halloween. The spider chain hanging from the door is made from a paper punch and then sewn together. The pumpkins are decorated with the same spiders and a little mod podge.


Monday, September 17, 2012

Rocker Re-do

Dennis eyed this old rocker at a recent garage sale and snagged it. That very same weekend he picked up some spray paint and got to work. I regret that I didn't get a complete before picture but imagine that the paint was a faded red just like the seat.
Before:

On Monday I grabbed some cute oilcloth, pulled the old cover off and stapled the new one on. We now have a "new" rocker on our back porch.
After: